NES-001 Purple Screen of Death Fix
As mentioned in my blog I just fixed my Nintendo after it got the purple screen of death. If your system is doing the same thing or you get no output at all with the red light flashing then most likely replacing the connector will fix it. I was surprised at how easy it was to replace the connector on the main board and how easily the whole thing came apart. The whole process took less than 40 min and I was back to gaming. From what I know the reason for the trouble with reading dirty games is due to the lock-out chip that is suppose to prevent you from playing games other than the ones from Nintendo. There is a way to disable it which is fairly easy but I didn't feel like braking out the soldering iron and spending too much time on this project.
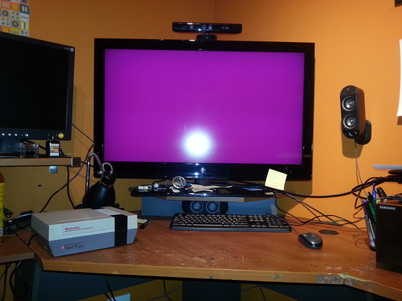
Purple Screen of Death
You can get a replacement connector on-line pretty easily and it shouldn't cost you that much. I got mine on eBay for under 10$, just search for "NES-001 72 pin connector" or something along those lines and it should come right up. Apart from that you will need a phillips screwdriver, acetone or any other solvent, Scotch bright pad, 1500 grid sand paper, paper towel, and a small flat head screw driver might make things easier but is not necessary. Also an air compressor or canned compressed air is good for cleaning the dust out. Start by unplugging the power source, controllers, and the A/V cables. Next flip your Nintendo upside down and remove the six screws circled in red (all of them are phillips). Sorry for the crappy pictures but my phone camera couldn't do better, I will have to get a real camera soon.
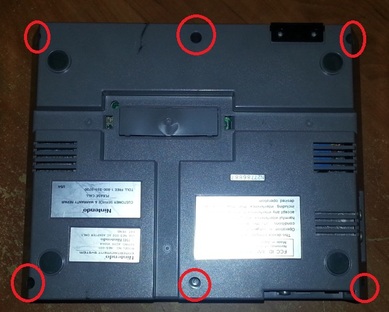
Remove these six screws.
Now flip the whole thing over and remove the top portion of the case, it should come right off since the screws were the only thing holding it. The next thing that has to come off is the metal cover over the loading slot. There is another six screws holding it in place so just remove those and it should lift up without any problems as well.
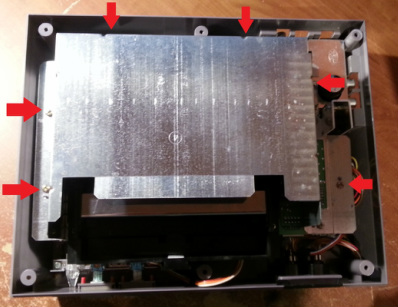
Another six screws that have to come out.
Next you have to get the slot loading mechanism out and the main board. To do this remove the eight screws holding them down and gently lift everything up. There is wires connected to the board for the buttons on the front and the controller connectors so don't pull too hard as not to rip them out. Once the whole assembly is lifted you can slide the loading mechanism forward to unhook it from the board and get it out of the way.
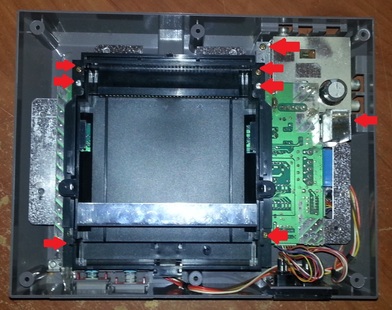
Remove the slot loading mechanism.
